Wednesday 21 February 2018

Butterfly Fly away!

Hello Again!

I would like to share my latest make for the That's Crafty Design Team blog and it is a card which includes several of the stamps from the That's Crafty Clear Stamp set - Textures Collection set 3 which I am really loving using.


I started with the background which was created using the script stamp inked up with Vintage Photo Distress Oxide ink and randomly stamped across cardstock.  I added some detail and dimension using the That's Crafty hole in the wall mask using the Texture sand paste which I have fallen in love with!

I then created the other layer of the backdrop using a great little crafty item lollypop sticks! I laid these down in an adhoc fence layout and painted them firstly with black gesso and then dry brushed over with white gesso and some Vintage Photo Distress Oxide ink.  The highlight the fencing idea I edged the wood with some gold metallic paint from the Multi-Surface paint collection. 

To add the main detail I started with stamping 3 leaves from the stamp set and cut them out.  I used some paper flowers to embellish. The main focus is the very pretty butterfly which I stamped and coloured and topped with glossy accents.

I hope that you like the project and the layout, let me know what you think!
Bye for now
Jo xx

I used:
That's Crafty Clear Stamp set - Textures Collection Set 3
Hole in the Wall Mask - TC066
That's Crafty Sand Texture Paste 
Vintage Photo Distress Oxide Ink
Antique Gold Metallic Multi-surface paint
String
Glossy Accents
Paper Flowers from stash
Lolly pop sticks


Friday 22 December 2017

"Time"

Hello Everyone!

Today I have a mixed media inverted canvas that I would like to share with you all using a selection of Powertex products.


I started off with a 12" x 9" canvas which I decided to invert to ring the changes.  This creates a lovely frame to use as a feature. 
Ivory Powertex was used throughout the project. 
I decided to use a variety of fabrics to create texture and these included cotton sheeting around the framework and as you know this creates some really lovely pleating which is how I created the draping on the corners.  I also used hessian on the background as this added a rustic look.


As you can see I have used lots of plaster moulds to add all the detailed pieces including the frame, face, cogs, screws and flowers.  I also included a few die cuts which included the main clock.
Sand and balls in different sizes added interest and dimension in the right top corner.


Easy structure through a few patterned masks created more interest on the frame.

The theme of the canvas was Time so I chose a phrase that I felt sums it up very well.
A mixture of Scrabble letters, printing from the PC and wooden letters added variety in the way that I added the words.  Glossy accents were then put over the top to protect the letters and also add thickness and gloss.


When it came around to colouring I have been itching to try out the new inks from Powertex and I am loving how they were so easy to apply and how effective and bright. It really made the project pop !
a little Violet Colourtrix finished the project off a treat and highlighted specific areas.

I hope that you have enjoyed checking this project out and that it has inspired you to have a go at an inverted canvas.
Bye for now,
Jo :) x


Saturday 11 November 2017

Remembrance Powertex Project

Hello Again!

I know blogging has been shocking! I'm sorry but back on track Again!!  and very much sorted ! lol

It is my pleasure to bring you a Powertex project that I have been working on for one of the most important dates in the annual calendar - Remembrance Sunday. 


First of all I planned out what I wanted to include in the project with the main feature being the Poppy.  These are a few of the recycled items that I started out with before I added any Powertex products.
Cardboard, an empty plastic trifle dish and a pen.

The pen casing became the bullets which were wrapped in fabric and then covered in Bronze Powertex.

 The cardboard became the base and the ground and this was also covered in fabric and Bronze Powertex.  Areas of the base were built up to give the idea of muddy fields. Dry brushing added texture and definition.

Then the red Powertex came out and 3 layers of bed sheeting was cut out and soaked for each Poppy. Quite a slow job but well worth it.  I used an empty chocolate tray to place the wet Poppies in so that they could take shape whilst air drying. The poppies then had the middles added with black acrylic paint and glossy accents.

The cross was sculpted out of polystyrene and then covered in Stoneart powder and Ivory Powertex. I wanted to achieve a rugged effect. Stoneart is one of my favourite techniques from Powertex.

A little close up shot of some of the bullets, a little faux barbed wire and the river of poppies.

I hope that you have enjoyed looking around my Remembrance project and it has inspired you to use your Powertex products to make a mixed media project of your own.

All products that I have used in the project are available from our website letscreateartandcrafts.co.uk and if you have any questions or would like to take part in a Powertex workshop please don't hesitate to get in touch on Facebook or email me on lets.create@btinternet.com

Thankyou so much for popping to check out the blog
and will be back really soon with another project.
Bye for now
Jo :)


Saturday 13 May 2017

It has been a while!

Hello!

Well I know its been a while but I'm back and will be returning to blog on a regular basis with lots of crafty makes including papercraft, scrapbooking, home décor, mixed media and most important all of my projects using the fabulous Powertex!

I think, some of us, since we have had Facebook have neglected our blogs and posting our crafty makes and passing on inspiration and information.  I aim to rectify this and blog at least once a week! and will let you know so you don't miss anything!

As you know, I'm sure, my crafting has taken another turn as both Mark and myself have been involved in the wonderful world of Powertex! We have both become certified tutors and I have also had the privilege of joining the Powertex Design Team and also representing the company on HOCHANDA. My blog posts won't always be centered around Powertex but when they are they will also be published on the Powertex Design Team Blog so that all you lovely addicts can have a peep at what we have been doing.

Anyhow, to kick off re-starting my blog I am going to share with you a Powertex project that I have been working on for my show last week.

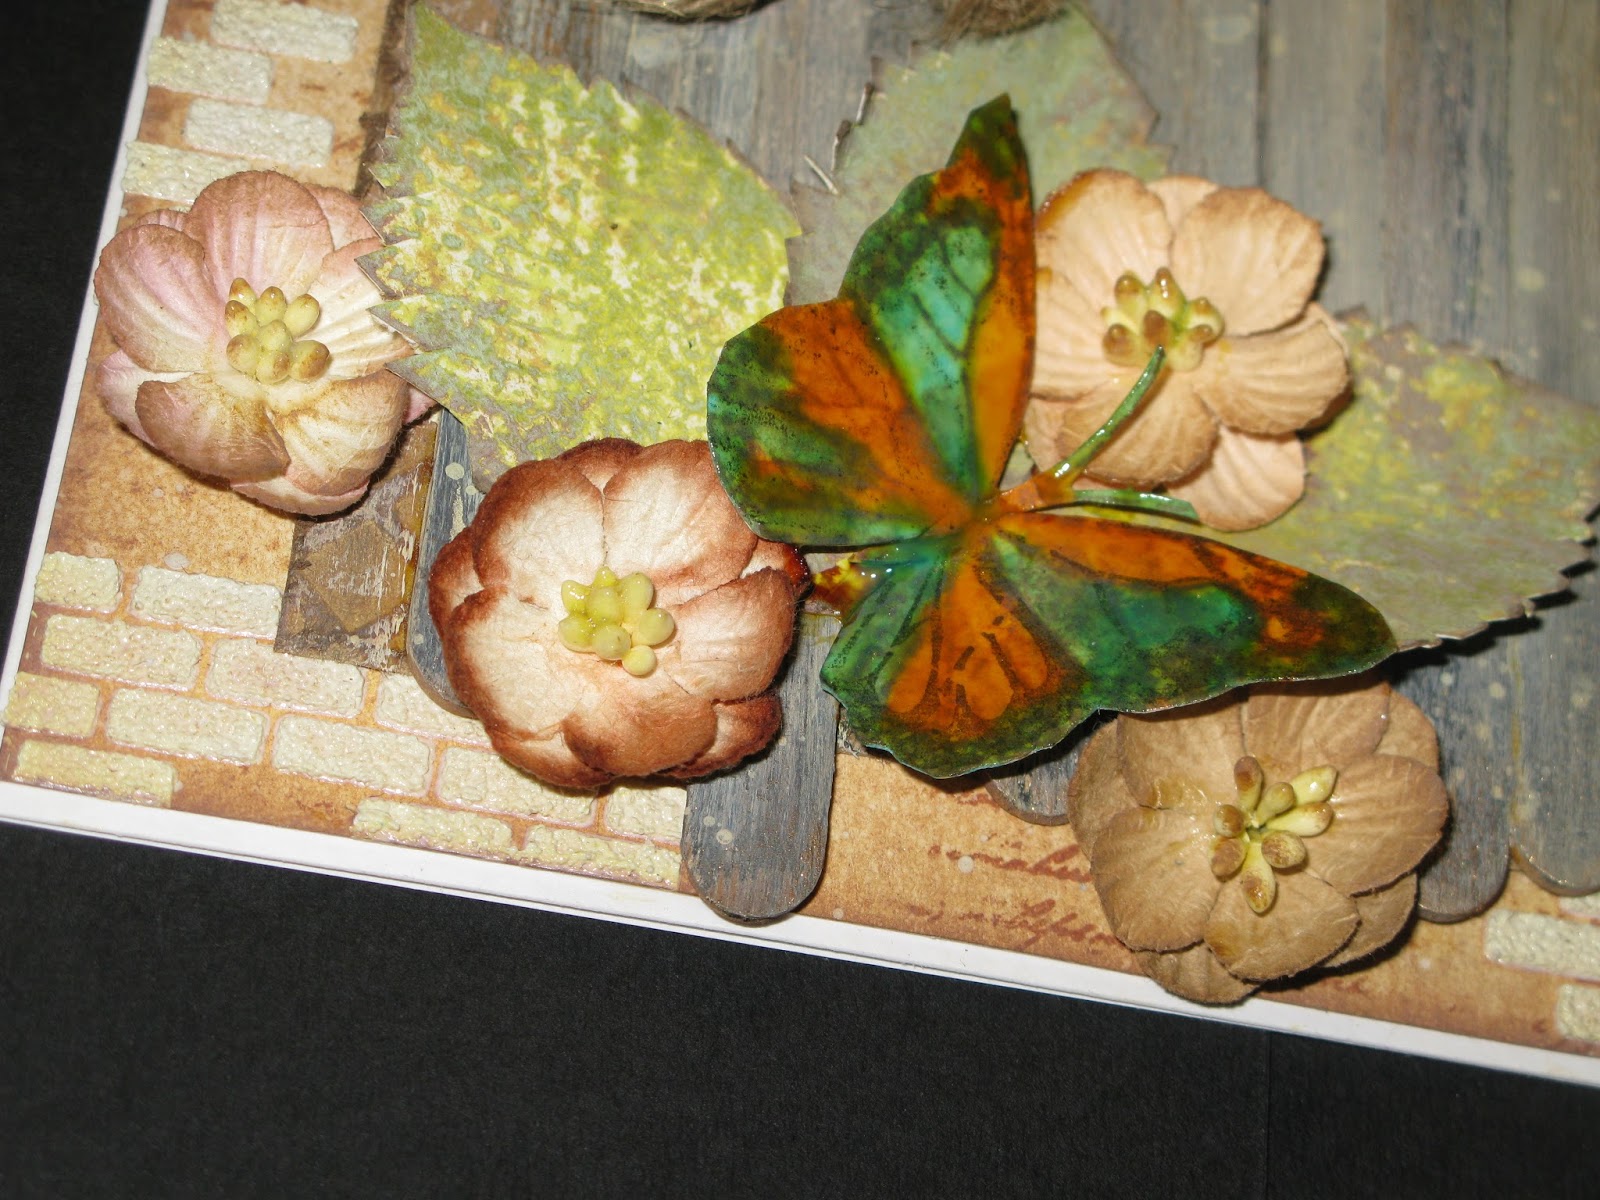
I have used one of the kits that we had on the show called the Home Deco Art set.  I have used a 30cm x 30cm canvas frame and then with my Bronze Powertex and my Stoneart powder I have created the Stoneart effect as the background of the piece.  The realistic effect that it gives you is incredible and I am loving working with these particular products to create the look that we have got.


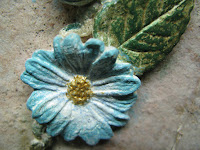
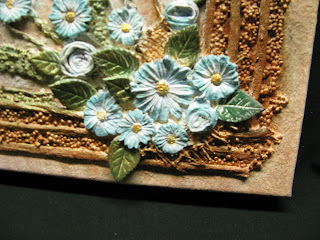
This is a couple of close up shots of one of the flowers that I have made to embellish the stoneart canvas.  The flowers are made from Stoneart clay which has been made using the Ivory Powertex and the Stoneart powder mixing equal amounts together and creating a clay that has a pastry like consistency. Keep mixing until your gloves (or fingers) do not stick to the clay and then you will be ok to start using the clay for whatever project you want.  In this case I have used the Daisy and matching leaf moulds that are exclusive to Powertex and can be found on their website.  (When using Ivory Powertex to make clay it is also suggested that you mix in a little of the Translucent Powertex with the ivory as this helps with the correct consistency.) The clay will last for several weeks if you keep it in a airtight container so if you mix too much up keep it for another project.
I left the flowers and leaves to airdry for a few hours and then used by Powertex Powders mixed into a little Ivory Powertex to create a lovely powder blue colour and then sponged this on to colour up the Daisy flowers.  The leaves were done in a similar way using the Green powder and then dry brushed over using some of the Colourtrix Green which gives this fabulous colour. I just added a little yellow to the middles to finish the flowers off.
For the rest of the canvas I used texture fabrics dipped into Ivory Powertex and also a variety of sizes from the sand and balls kit to add interest and lots of dimension.
I hope that you have been inspired to have a go at the Stoneart both for making backgrounds and for making clay to make embellishments and more texture to your projects.
It really is a lovely project to get your teeth into and the end result is so satisfying!
Please send photographs into the Powertex Addicts Facebook page to show us all what you have been getting up to, we love it when everyone shares their work.
I will be back with another project soon but, for the time being, enjoy your crafting and
bye for now,
Jo x


Saturday 5 September 2015

The concertina effect!

Good Morning fellow crafters!

I hope everyone is well and all the children in your house are all back to school and are happy.
The nights, unfortunately, are really pulling in and the mornings have quite a nip in the air so I think Autumn is well and truly on its way but that always gives us some extra time to get stuck into our crafting projects and hopefully I can give you some inspiration with the projects that we have been busy doing in class today.
The projects were all based around concertina dies and this one is from the Crafters Companion Die-sire range.  This is the rectangle design and I have also used the Jingle bells overlay.  The photograph doesn't show off the glitter card but it is quite sparkly.
 
The poinsettias are from a punch and I sprayed them with a pearl spray to bling them up a bit.
The next one definitely has a Autumn feel to it using this really lovely Graphic 45 paper and Heartfelt Creations Sunflower stamp.  The sentiment is from a paper artsy set that I love to use.  This die set is from the Elizabeth Designs collection.
 
 
I have also got some lovely pictures from our recent Dabble Day which was a fabulous success again and thank everyone for attending.
Busy ladies doing what they do best!


Our next Dabble day is in November and this will be Christmas so looking forward to this one.
Today we have the lovely Clare Charville coming to the shop for a demonstration day and on Sunday we have a workshop and I am a student!! Hopefully, if I finish the project I will be able to show you it next week.
Hope that you enjoy a lovely weekend and thankyou, as always for popping in.
I would love to hear if you have had a go at the concertina type card.
Must dash a busy day ahead,
Bye for now,
Jo x


Saturday 22 August 2015

Our Birthday Weekend

Good Morning my lovely crafty Friends,

Hope you are all well and looking forward to the weekend.
Today I have some fabulous news and some sad news.
Firstly the sad news. Unfortunately I am having to step down from the Allsorts Challenge Team as other things have become more pressing.  I have thoroughly enjoyed being part of the team for over 4 years and I have seen some fabulous work from both members of my team and also from the lovely crafters taking part in the Challenge each week. This has not been an easy decision but one I must take.
 
So now for the fabulous news! Let's Create has been nominated for the Best Independent Craft shop in the Midlands area! we are soooooo pleased and can not thank whoever nominated us for this enough.
Voting starts during September and so we will have everything crossed!!
 
 I have some lovely photographs from our birthday weekend and would love to share them with you.
It was a tremendous success and so many of our lovely customers came along to celebrate thankyou to everyone that came along to the demo day and the workshop.


As you can see a brilliant day had by all! 
I will still be posting on my blog on a Saturday morning so hope that you can still pop in to say hello and see what we have been getting up to!.
We have a children's birthday party at the shop today 10 10 year olds so lots of messy play ahead!
Have a fabulous weekend whatever you are planning and see you soon,
bye for now
Jo xx


Friday 14 August 2015

Week 318 - Use your favourite colour

Good Morning!


Thankyou so much for popping in and a quick post today as it is our birthday weekend at the shop this weekend and the fabulous Sheena Douglass is coming to demonstrate today and hold a workshop tomorrow and there is lots to do!! can't wait though it is going to be a fabulous time.
This week for Allsorts it is my turn to host and I have chosen :-


"Use your favourite Colour !"
as the theme for the Challenge this week and

as you can see from the clue in the title I do like all shades of red - I think that it really brightens everyone up and it is cheerful. This is the card I would like to show you using red!


There is plenty of red in this project starting off with the poppies from the Victorian Florals collection of dies and stamps from Sheena and these have been coloured in using Aqua Tints.
The background has been made using the wonderful Brushos and I am pleased to say that we have got them re-stocked on our website again letscreateartandcrafts.co.uk if you would like to have a go at using these fabulous crafty goodies.  Remember p and p is free over a £10 purchase.
Thankyou for popping in and please pop over to the Allsorts Challenge blog to have a look at the Teams inspiration for this weeks theme.
Thankyou so much for popping in and hope that you enjoy a lovely weekend. I will pop some photographs of our birthday weekend on here so that you can have a peep.
Bye for now
Jo xx